
Some of the most important features of Adobe After Effects and Adobe Premiere Pro are its basic effects. The more Adobe improves its programs, the more we feel the need of these effects. Curves is one of the oldest and most effective tools for a professional editor to use while compositing and color shading.
This is why I decided to share my experience about using curves in this post. I’m sure there’s a lot more to know about “Curves” in Adobe After Effects and Adobe Premiere Pro and I’d be glad to hear from everyone who has a little experience that we will add value.
This is not a presentation of this tool and I will not go through all the functions. That’s the kind of stuff you’ll find in Adobe’s online and print manuals. This is more about sharing my experience and understanding about this tool over the last 15 years of editing and compositing.
Beginners, intermediates and experts can see how effective can a very simple effect be.
The pictures below are before and after adding very basic contrast with curves.

And the following image shows the very simple change made on curves effect in Adobe After Effects.
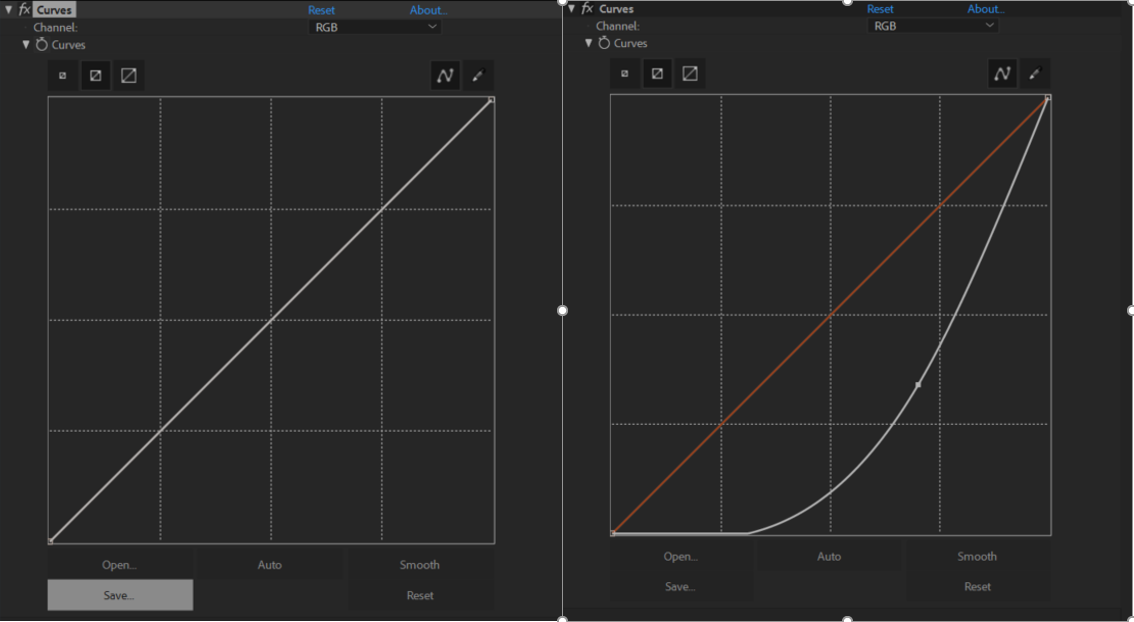
As you can see a point is added on the middle of the 45° curve line and brought to closer to the right down corner from the center.
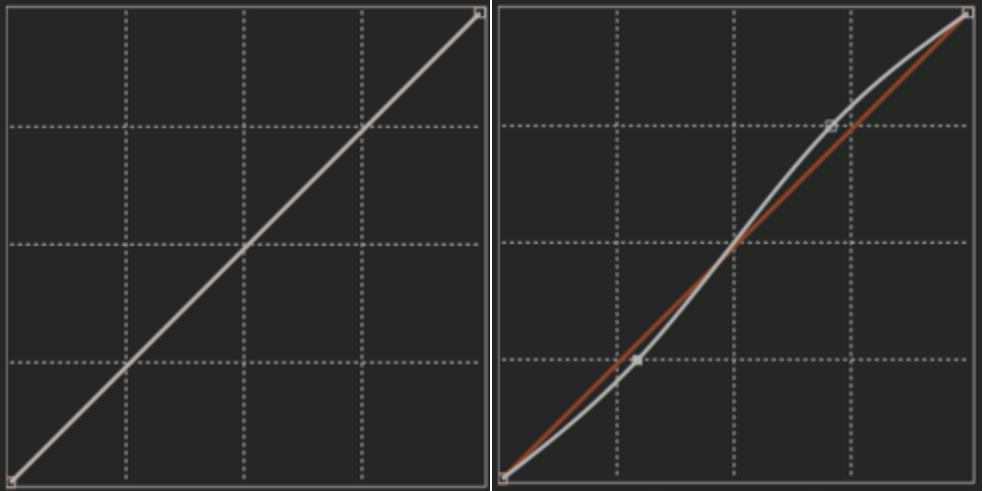
To understand what exactly Curves does, it is good to learn the meaning of the lower right and the upper left corner. The upper left corner is the brighter side and the lower right corner is the darker side. In other words “up is white” and “down is black”.

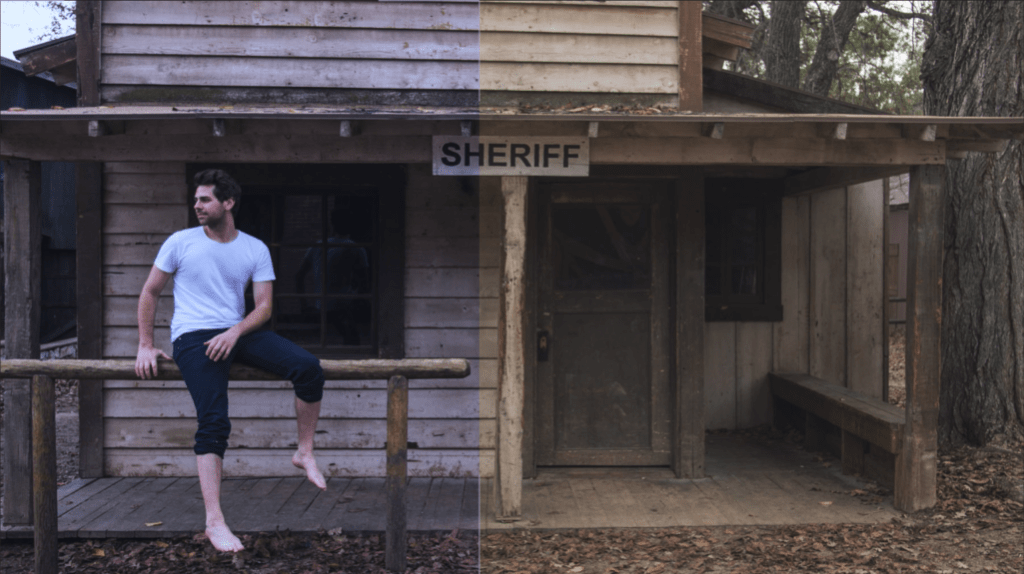
In the example picture we can see that the original image is a very dusty and covered with a white solid image that even distract the viewer. To solve that, we need to give some contrast to the image. It’s not guaranteed to give a perfect quality to a low-quality or poorly colored footage, but it improves it, and in most cases, average viewers won’t realize the difference between a very high-quality footage and a retouched footage in Adobe After Effects or Adobe Premiere Pro or even images in Adobe Photoshop.
Using curves is a simple way to make our footages look more professional with cinematic contrast if needed.
To give more contrast we need to brighten the black color which seems weird. Black is dark, so how can we brighten the darkness. That’s exactly the point.
In the above image, we can see that the black colors are shiny as in the raw footage and the black were faded in the white. This is what curves does: Brighten the dark and darken the bright. What we did in our image is to simply bring the midpoint of our black to white line closer to the black from the center. In that case we can repair the dusty image.
Now another example:
Look at the image below and you can see the differences before and after adding contrast with curves.

And below you can see the differences make on the curves effect
As you can see by adding two points on an upper and lower halves of the slide we can do magic. This is how we can add a nice contrast to our footages.
In this case, we added a little bit whiter on the bright areas of our footage and then we brightened a bit the dark areas and you can see the difference.
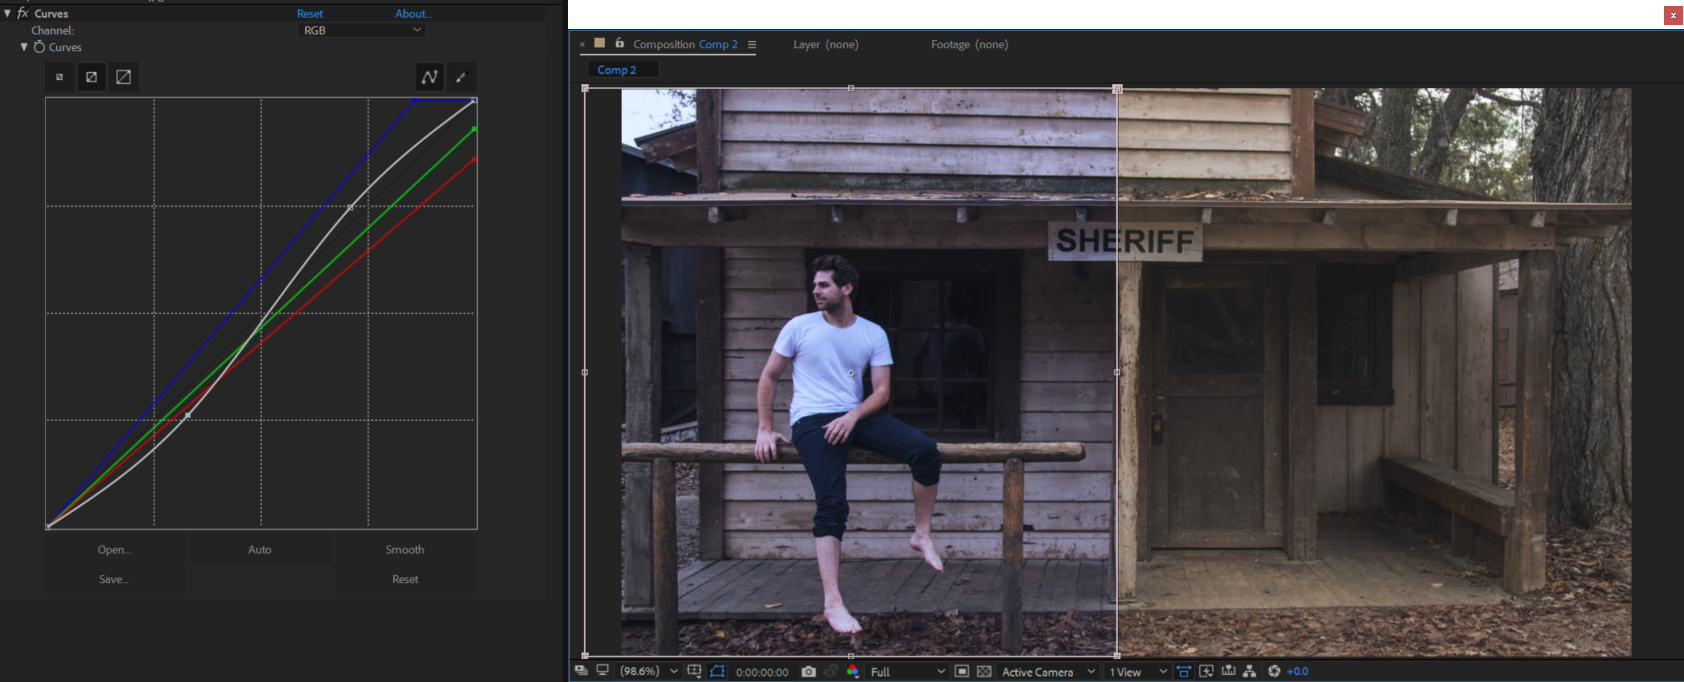
Now let’s see if we can also color-correct our footages with the curves:
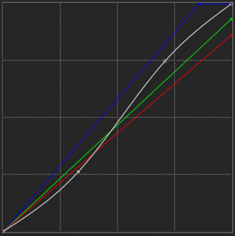
Let’s say we want our footage to be a bit bluer and less green. Here’s what we can do. We can choose the value of each RGB on the curve and change them individually. And instead of adding multiple confusing effects, we can simply do everything with the curves. And this is how it looks like at the end.
Below is the curves diagram. You can see that we darkened the green and red, then we moved the blue closer to our left-up corner to make it more nuanced in our footage.
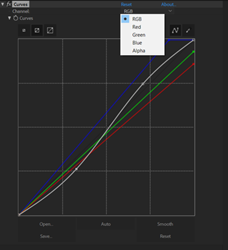
Below you can see how to choose the specific color that we want to change its value.
I am sure that for all professional video producers, Curves is one of the most used effects in compositing. I also use curves in Adobe Premiere Pro, but the interface is not as user friendly as in Adobe After Effects. Therefore I prefer to bring my footages in Adobe After Effects even if it might take more time, but I think it is worth the effort.
Once again, this is not about learning how to use the tools or an education of the basics. On its own, Curves is an effect with various functions that we can use it in different way for different reasons.
We just want to say that in professional video editing, we always try to use the most basic effects to solve the most complicated problems while compositing. Curves can be one of the best effects to remap black and white, give more contrast, adjust colors, enhance, match colors between shots in one sequence etc… for a fast and professional editor.

One Reply to “How to do compositing and color shading in Adobe After Effects and Premiere Pro using Curves”
Comments are closed.